Friday, July 26, 2019

July Goal: Baby Quilt Finish

I finished the baby quilt!

It's the second one from a jelly roll my friend gave me.
Both quilts will be donated to new moms in need.
The red butterfly binding is a great frame for the mostly pastel quilt.

I quilted a few twisting ribbons with my walking foot--nothing fancy.

Visit Patty and her guests at Elm Street Quilts
to enjoy some other finishes.

Thursday, July 4, 2019

July Goal: Baby Charity Quilt

It's time to set a new monthly sewing goal!
A friend gave me a sweet jelly roll that I used to make two rail fence baby quilts.
The first used the strips with more red and brighter colors.
This pastel quilt needs to be finished and donated to my friend's charity!
My July goal is to sandwich, quilt, and bind this baby gift.  I have the fabric--now to find the time!

Sunday, June 30, 2019

June Goal--Success!

It's time to check in to see who's accomplished the June One Monthly Goal,
 hosted by Patty at Elm Street Quilts.
 I did finish piecing the citrus quilt.  Yes, it's very simple.

Now I'm working on the quilting plan.  I want to quilt large citrus slices all over.
My sample has a 9" diameter.  
I traced a circle onto freezer paper and ironed it onto a quilt sandwich.
Next I FMQ'd rings around the circle, then removed the paper and quilted the segments.
 It looks pretty bad, but I'm satisfied with it as practice #1.
If I use a walking foot for the circles they will look better, but I'll be doing a lot more maneuvering of the quilt.  If I go that route I'll walk all the circles then go back to FMQ the segments.
I will quilt with white thread which won't be as obvious as this red on white. 
Thanks again, Patty, for the motivation!

Thursday, June 6, 2019

June Goal: Citrus Quilt

Participating in Patty's One Monthly Goal has been a terrific motivator for me, 
helping me actually do the sewing I want to do.  
I just missed my goal in May (finishing enough star blocks to make 20) 
but have now completed it and then some--I'm up to 22 now.

This past weekend I attended my guild's annual quilt show.  
I have yet to contribute a quilt--hopefully next year.

I did find and purchase some gorgeous fat quarters.  After seeing a flying geese quilt made of gigantic HST, I was inspired to make something similar.  The citrus design is so large that it would be a shame to cut it into tiny pieces.  I went back to the vendor for more fabric, but came up a little short, requiring an online search.

Meanwhile my college daughter fell in love with the fabric and we decided she deserves this (hopefully) quick quilt.  I bought more citrus online (not much left out there) and on Monday we drove to a local store for coordinating solids.  I washed, dried, and pressed everything and today managed a bit of cutting and sewing.
 The HST are made with yellow and coral.  
There will be a blue border and the binding will be more citrus fabric; 
daughter and I both love the multi-colored vibe.

Tonight we played around with layouts and this chevron was the winner.  I also liked the flying geese (3 yellow pointed one way and 3 coral pointed the other) but this is not my quilt!
(The colors in the top photo are more accurate than the faded ones here.)

My goal for June is to finish this quilt top (chevrons plus border).  I also want to plan and begin the quilting.  I've only FMQ on small projects so far, and it typically looks pretty bad.  What I'm hoping to have the guts to do is a combination of walking foot and FMQ.  I want to mimic the citrus slices with large walking foot rings filled in with free motion segments.  We'll see.

To see the goals of Patty's other participants, visit her link up at Elm Street Quilts.

Friday, May 31, 2019

May Goal--Another Near Miss

My sewing goal for May was to finish enough star blocks to bring my current collection to 20.
I've got 14 completely done and 8 nearly there.  Soon I'll have 22.
 You may not be able to tell by my incomplete success, but Patty's One Monthly Goal IS a motivator for me.  I'm not typically a productive quilter and OMG gives me some focus.
Check out other sewers' stories at Elm Street Quilts.
Here is one of my distractions this month.  
I attended a workshop taught by Karen Eckmeier--Accidental Landscapes.  
She is a terrific teacher--encouraging and creative.  
I had a great time and my family is impressed with the progress on my project so far.

Monday, May 6, 2019

May One Monthly Goal: 10 More Star Blocks


I'm slowly, slowly progressing towards a king-size quilt for our bed.  
I've resized the no point stars block from Allison at Cluck Cluck Sew.

The last time I did any sewing was at my quilting retreat weekend in March.  I have cut more pieces (with only a few scraps left from each prewashed fat quarter) to make mini kits.

My goal for May is to finish sewing the half done March blocks plus my newly cut squares for a total of 20 completed blocks.  I'll then be 28% done with the 72 blocks I need for this quilt!  Honestly, if this is done by winter 2019 I'll be thrilled.

Thank you to Patty at Elm Street Quilts for the monthly inspiration.  
Check out her blog to see lots of other folks' May goals.

Sunday, March 31, 2019

March One Monthly Goal--No Point Stars

My goal this month was to make a no-point-stars block (from Cluck Cluck Sew) 
accurately enough to begin my king size quilt project and to make ten blocks.
 My sample block (made in the fall) was way too small (7/8"!) but this weekend 
I succeeded in an accurate block (above).
 I use two fat quarters to make two 12" blocks.
 I needed to take great care on the ones with stripes and directional rows of flowers.
 It was slow going, with precise sewing and sometimes finicky trimming.
 I've completed six blocks.  Once I sew eight more seams I'll have the four blocks below DONE.
These will be the last of the flowered stripes until I start on the next FQ set.
Check out everyone else's finishes at Elm Street Quilts.

Tuesday, March 5, 2019

March Goal--King Quilt plan and sample blocks

A few years ago my wonderful husband updated our 20+ year old bedroom.  Does anyone remember sponge painted walls?  Ours were sea green and pink!  He created a soothing, B & B look of warm browns, including a chair rail and painted baseboard.  It looks terrific!

When I saw the collection of Eliza's Indigo fabric I knew it would be perfect for our quilt.  I bought a fat quarter set (40!) but after some calculating (we have a king size bed)  hunted down a second set.  The fabric sat.  And sat.
I've dithered about, trying to find a pattern that will show off the fabric, will not need more than 80 fat quarters, and that I'm able to sew well.  Len and I have settled on Allison's No Point Stars pattern from Cluck Cluck Sew.  I like that more background fabric shows in each block (vs. a classic sawtooth star block) and that the star points don't need to be matched.
Here's where Patty's One Monthly Goal comes in.  I have to tweak Allison's pattern to change my block size.  When I sewed my first sample (above) it turned out much smaller (almost an inch!) than I had calculated.  I need to improve my seam accuracy and use bigger fabric pieces to allow for more trimming.

My goal for this month is to cut and sew until I make a block that is the correct size for my king size quilt.  I also need to do all the math--quilt dimensions, block dimensions, size of all the bits and pieces.  I intend to take enough fabric pairs to sew ten blocks while on my quilt guild retreat at the end of the month.  It may not look like much, but this will take me a while!
Follow this link to Elm Street Quilts to see what needle art goals others are striving for.  Happy March!

Thursday, February 28, 2019

February Goal--So Close!


Finishing my granddaughter's "I Spy" quilt was my February goal, and I am so close!
 It is backed, quilted, squared, and mostly bound.
The binding has been machine stitched to the front; 
I am almost halfway through handstitching it to the back.
 I used my walking foot to make a simple quilted grid.  
For me, fabric is the star of an "I Spy," so I am happy to keep the quilting low key.
 I made my own bias binding (it's more durable than straight-of-grain) for the first time.  I mostly followed this tutorial for continuous bias binding.  It doesn't waste fabric like the traditional method does, but in some areas (see below) the seams are very close together.
I am dutiful about labeling my quilts.  I write on a piece of fabric and turn two edges under.  The two raw edges are sewn into a quilt corner by machine as the binding is added to the top.  The turned down edges are hand stitched.

This time instead of using a micron pen I wrote with a Pentel fabric gel roller.  It is awesome!  It writes so much more easily and made a beautiful, dark line.  The package doesn't suggest it, but after being disappointed by other markers, I heat set the ink with a hot, dry iron.  I washed my sample--no smudging!

Check out the link up at Elm Street Quilts to see how well others have accomplished their One Monthly Goals!

Tuesday, February 5, 2019

February Goal: I Spy Quilt

I gave my granddaughter an "I Spy" quilt for her birthday last month--sort  of.
 I actually presented several large pieces of the top.  
Perhaps you can see the gaps below where seams have not yet been sewn.
I love the "I Spy" concept, and this quilt has 160 unique blocks!
 Border, binding, and backing fabrics have already been selected. 
My goal for February is to complete this quilt--borders, backing, quilting, and binding.
I'm joining Patty and many others at Elm Street Quilts in setting sewing goals for the month.
Follow the link to see what everyone else is up to.
Happy stitching!

Wednesday, January 30, 2019

January Finish--Weighted Blanket


I've now participated in my first One Monthly Goal event--success!
I started and finished a weighted blanket for my grandson.
Inspired by a tutorial from CJ of the I Love My Kids blog as well as size and weight ideas from Mosaic Weighted Blankets, I tweaked the procedure to use batting instead of polyfil stuffing.

 The fabrics his parents chose are a bit simple but they coordinate with his "I Spy" quilt.
Filling the columns and sewing around the pellets was challenging at first, but I got the hang of it by the end of this project.  I've written a tutorial for my version in case you're interested.

Thanks to Patty of Elm Street Quilts for inspiring this finish!  Visit her link up to see what other folks have accomplished.

Weighted Blanket Tutorial

 A couple of years ago I read online that weighted blankets can help people relax and sleep better, especially those with anxiety or sensory issues.  I thought about making one for my young grandson but did nothing.  Recently an occupational therapist friend strongly recommended trying one.  She mentioned Mosaic Weighted Blankets as a source of high quality blankets, but I had seen DIY tutorials and decided to make one myself.
While I read or watched several tutorials, 
the most helpful for me was by CJ of the I Love My Kids blog.  Find it here.
The instructions I found used non-toxic, washable plastic pellets and polyester fiber stuffing.  I bought the pellets using a coupon at JoAnn's, although better prices can be found online if you buy a larger quantity.

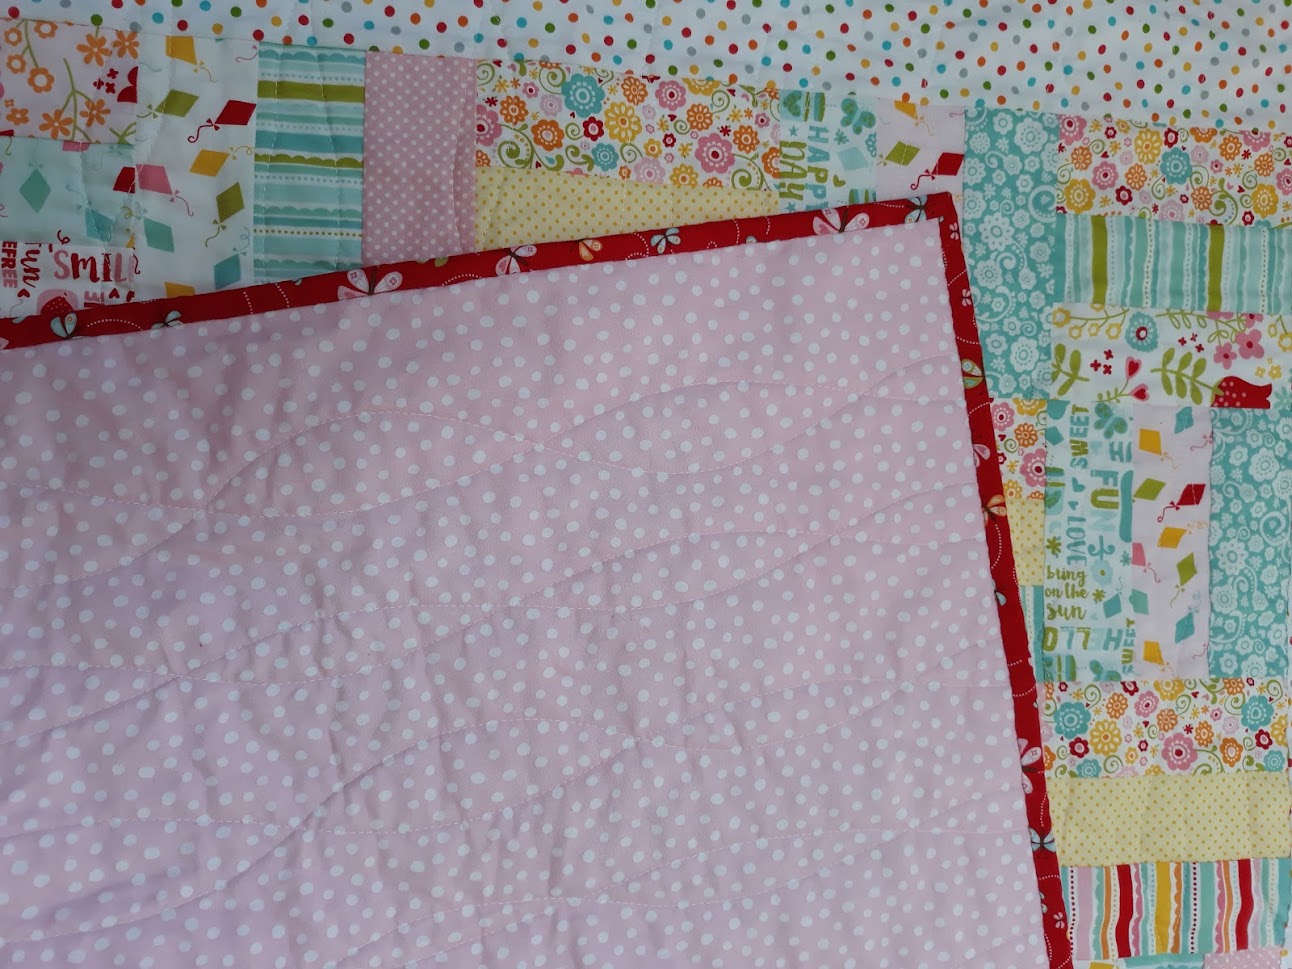
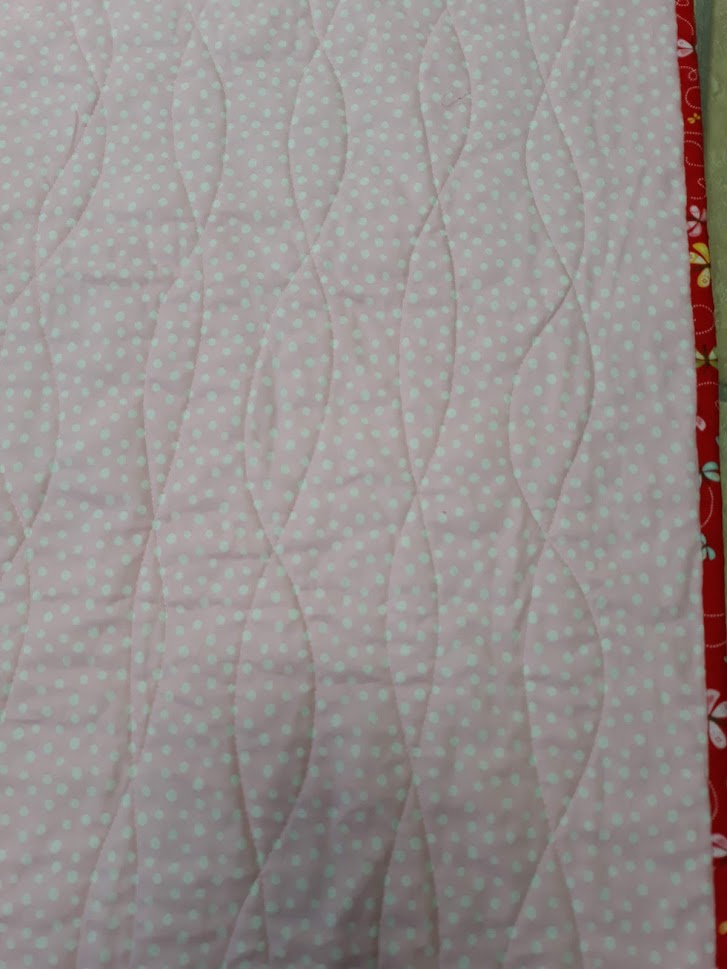
I decided I wanted to use cotton quilt batting instead of stuffing.  I prefer cotton in general, and I liked the idea that with batting one side of the blanket would be smooth and the other pebbly.  I suspect that with stuffing the pellets would always fall to the down side, taking away the choice of textures.

Using batting meant I had to tweak CJ's tutorial.  Here are my notes in case you'd like to try your own DIY.

The guidelines I've seen recommend that for a child a blanket should weigh 10% of his body weight plus one or two pounds so I decided on 5.5 # for this one.  The smallest size (and weight) on the Mosaic site is 38 x 42", so that was my goal.  I cut my fabric 40 x 44" to allow for seams and shrinking from quilting.  (I prewash my fabric and so don't worry about major shrinkage.)
 I turned the top edges down 1/2" and pressed.
Then I layered my fabric and batting:  backing (green) fabric right side up on the bottom, then top fabric right side down, then the batting right side down.  Yes, most batting has a top and bottom!  With my warm and white cotton batting, the slightly pilly side is the top and the dimpled side is the bottom.  It's easier to quilt from the top since that's the same way the needle-punched batting was produced.  (Updated 4/2020: I had this info reversed until recently--The Warm Company's FAQ page set me straight.)

I don't know if you can see it, but my batting is pushed all the way into the ironed crease of the top fabric.  When the final seams are stitched the batting will be secured inside.
I clipped the top folded edges together to make sure that side stayed as even as possible.  Then I sewed around the other three sides in one continuous line, pivoting at the corners.  Sew from the very top--don't leave a loose edge at the corner.  I used a small stitch length (1.8?) to make the blanket sturdy and prevent migration of the plastic pellets.
Trim the batting close to the line of stitching and clip the bottom corners of the fabric to make turning easier and neater.  Turn the blanket right side out  and press the edges.  Top stitch around three sides.  I made two rows of stitching for extra security.  I used a walking foot for this project since I was sewing three layers.

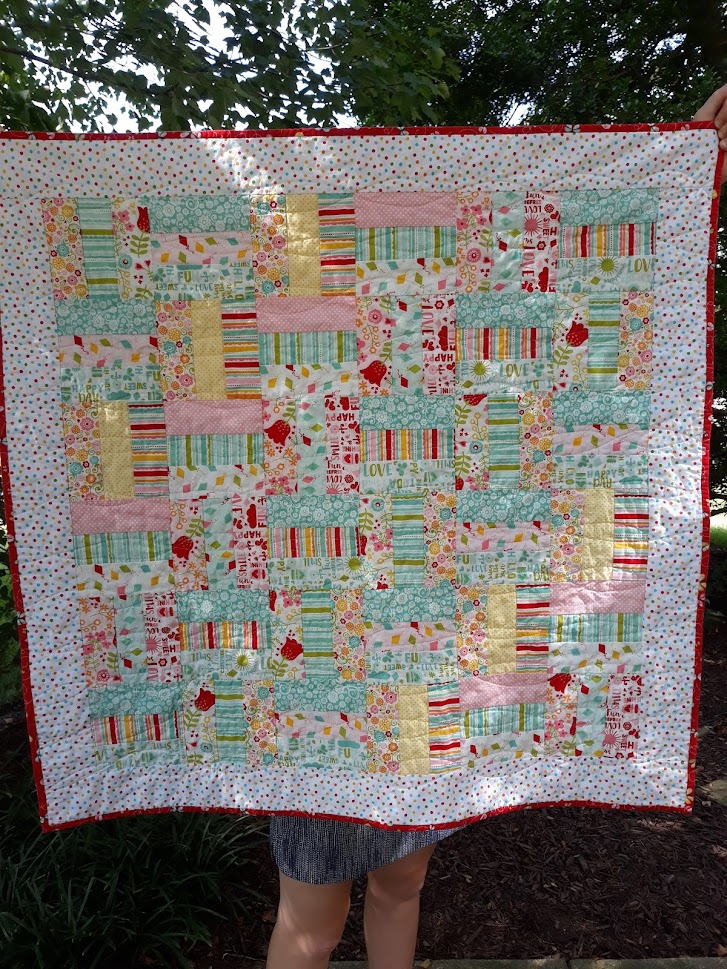
Now it's time to calculate how many pockets the blanket will have.  I decided I preferred multiple small squares and settled on a grid of 8 columns and 8 rows--64 pockets.

The next step is to mark and sew the columns.  These are the lines going from the bottom to the open top of the blanket.  I used a pencil to make tiny marks evenly spaced across the bottom.  Then I used a hera marker and a quilting ruler to make creases for sewing guides.  I'd rather not use ink, chalk, etc.--the creases show up well on light fabric, are easy to follow, can't damage the fabric, and won't last long.

Anyway, after marking your columns however you like, sew along the lines.  As before, I made two rows of stitching and used a small stitch length for extra security.  I sewed from bottom to top because I didn't want any bunchiness at the bottom.  Next time I'll start stitching at the top so those folded edges stay perfectly even.  Once the pellets are sewn in all the pockets are a little puffy, so I believe any unevenness at the bottom won't be noticed.

The photos above and below show the blanket with the vertical seams sewn and the rows across marked with creases.
Now it's time for filling!  My goal was a 5.5 # blanket and I made the mistake of adding 5.5 # of pellets.  With fabric and batting the final product weighed a bit more than 6.5#!  The blanket is big enough that the whole thing isn't on my grandson at once, but you may want to factor that into your calculations.

I'm fortunate enough to have a digital kitchen scale, so I was able to portion my pellets in grams instead of ounces for greater accuracy.  It was easy to find a conversion tool online--5.5 # equals about 2495 grams.  2495 divided by 64 pockets equals 39 grams of pellets per pocket.
Weigh and pour the first batch of plastic pellets into each column.  Caution!  When I simply poured from the top, tons of pellets stuck to the batting on the way instead of falling to the bottom.  I don't know if it was friction or static, but trying to move them down (I ended up scraping with a yardstick) was a pain!  For the remaining rows I inserted a wrapping paper tube into the blanket and poured the pellets through it all the way to the bottom.  So much better!

Once each column has one batch of pellets (39 grams for mine) it's time to sew along the first crease to form the first set of pockets.  I found that it's helpful to use a row of pins to try to keep the pellets on the far side of the pocket, away from the needle.  Without pins the pellets roam all over, including into the path of the needle--not fun, believe me!
 Once again I sewed two seams.
 As you fill more pockets and the blanket gets heavier, folding it onto your extension table (if you have one) makes it easier to move everything along.
 Last row!
 It was easy to drop in the final pellets.
 Pin the pellets back as usual and clip or pin the top closed.  Sew as close to the top edge as possible (twice, of course) to catch the folded edge in your line of stitching.

Since I had sewn my columns from the bottom up, the folded edges were no longer even along the whole length.  I had to fiddle pocket by pocket to secure the top edge neatly.  Learn from my error!
 Done!
 My grandson likes his blanket, often giggling when he's under it. ☺❤