Wednesday, January 30, 2019

Weighted Blanket Tutorial

 A couple of years ago I read online that weighted blankets can help people relax and sleep better, especially those with anxiety or sensory issues.  I thought about making one for my young grandson but did nothing.  Recently an occupational therapist friend strongly recommended trying one.  She mentioned Mosaic Weighted Blankets as a source of high quality blankets, but I had seen DIY tutorials and decided to make one myself.
While I read or watched several tutorials, 
the most helpful for me was by CJ of the I Love My Kids blog.  Find it here.
The instructions I found used non-toxic, washable plastic pellets and polyester fiber stuffing.  I bought the pellets using a coupon at JoAnn's, although better prices can be found online if you buy a larger quantity.

I decided I wanted to use cotton quilt batting instead of stuffing.  I prefer cotton in general, and I liked the idea that with batting one side of the blanket would be smooth and the other pebbly.  I suspect that with stuffing the pellets would always fall to the down side, taking away the choice of textures.

Using batting meant I had to tweak CJ's tutorial.  Here are my notes in case you'd like to try your own DIY.

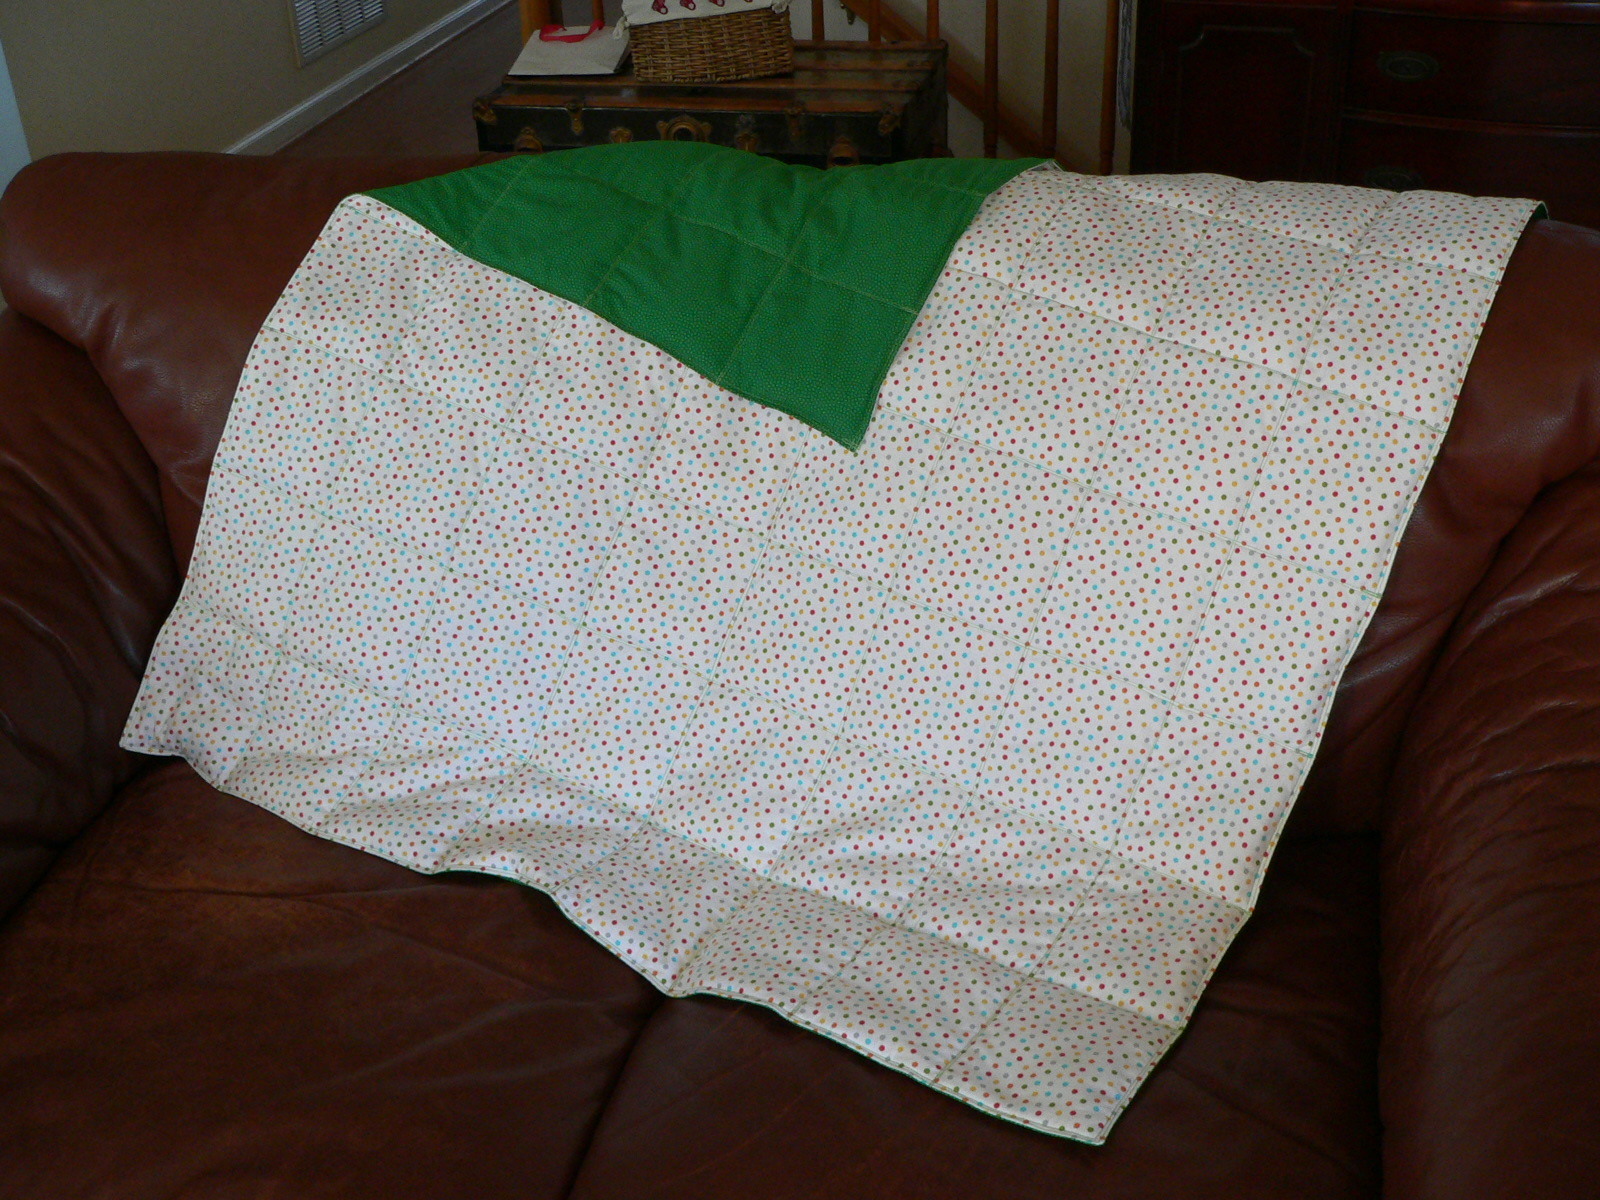
The guidelines I've seen recommend that for a child a blanket should weigh 10% of his body weight plus one or two pounds so I decided on 5.5 # for this one.  The smallest size (and weight) on the Mosaic site is 38 x 42", so that was my goal.  I cut my fabric 40 x 44" to allow for seams and shrinking from quilting.  (I prewash my fabric and so don't worry about major shrinkage.)
 I turned the top edges down 1/2" and pressed.
Then I layered my fabric and batting:  backing (green) fabric right side up on the bottom, then top fabric right side down, then the batting right side down.  Yes, most batting has a top and bottom!  With my warm and white cotton batting, the slightly pilly side is the top and the dimpled side is the bottom.  It's easier to quilt from the top since that's the same way the needle-punched batting was produced.  (Updated 4/2020: I had this info reversed until recently--The Warm Company's FAQ page set me straight.)

I don't know if you can see it, but my batting is pushed all the way into the ironed crease of the top fabric.  When the final seams are stitched the batting will be secured inside.
I clipped the top folded edges together to make sure that side stayed as even as possible.  Then I sewed around the other three sides in one continuous line, pivoting at the corners.  Sew from the very top--don't leave a loose edge at the corner.  I used a small stitch length (1.8?) to make the blanket sturdy and prevent migration of the plastic pellets.
Trim the batting close to the line of stitching and clip the bottom corners of the fabric to make turning easier and neater.  Turn the blanket right side out  and press the edges.  Top stitch around three sides.  I made two rows of stitching for extra security.  I used a walking foot for this project since I was sewing three layers.

Now it's time to calculate how many pockets the blanket will have.  I decided I preferred multiple small squares and settled on a grid of 8 columns and 8 rows--64 pockets.

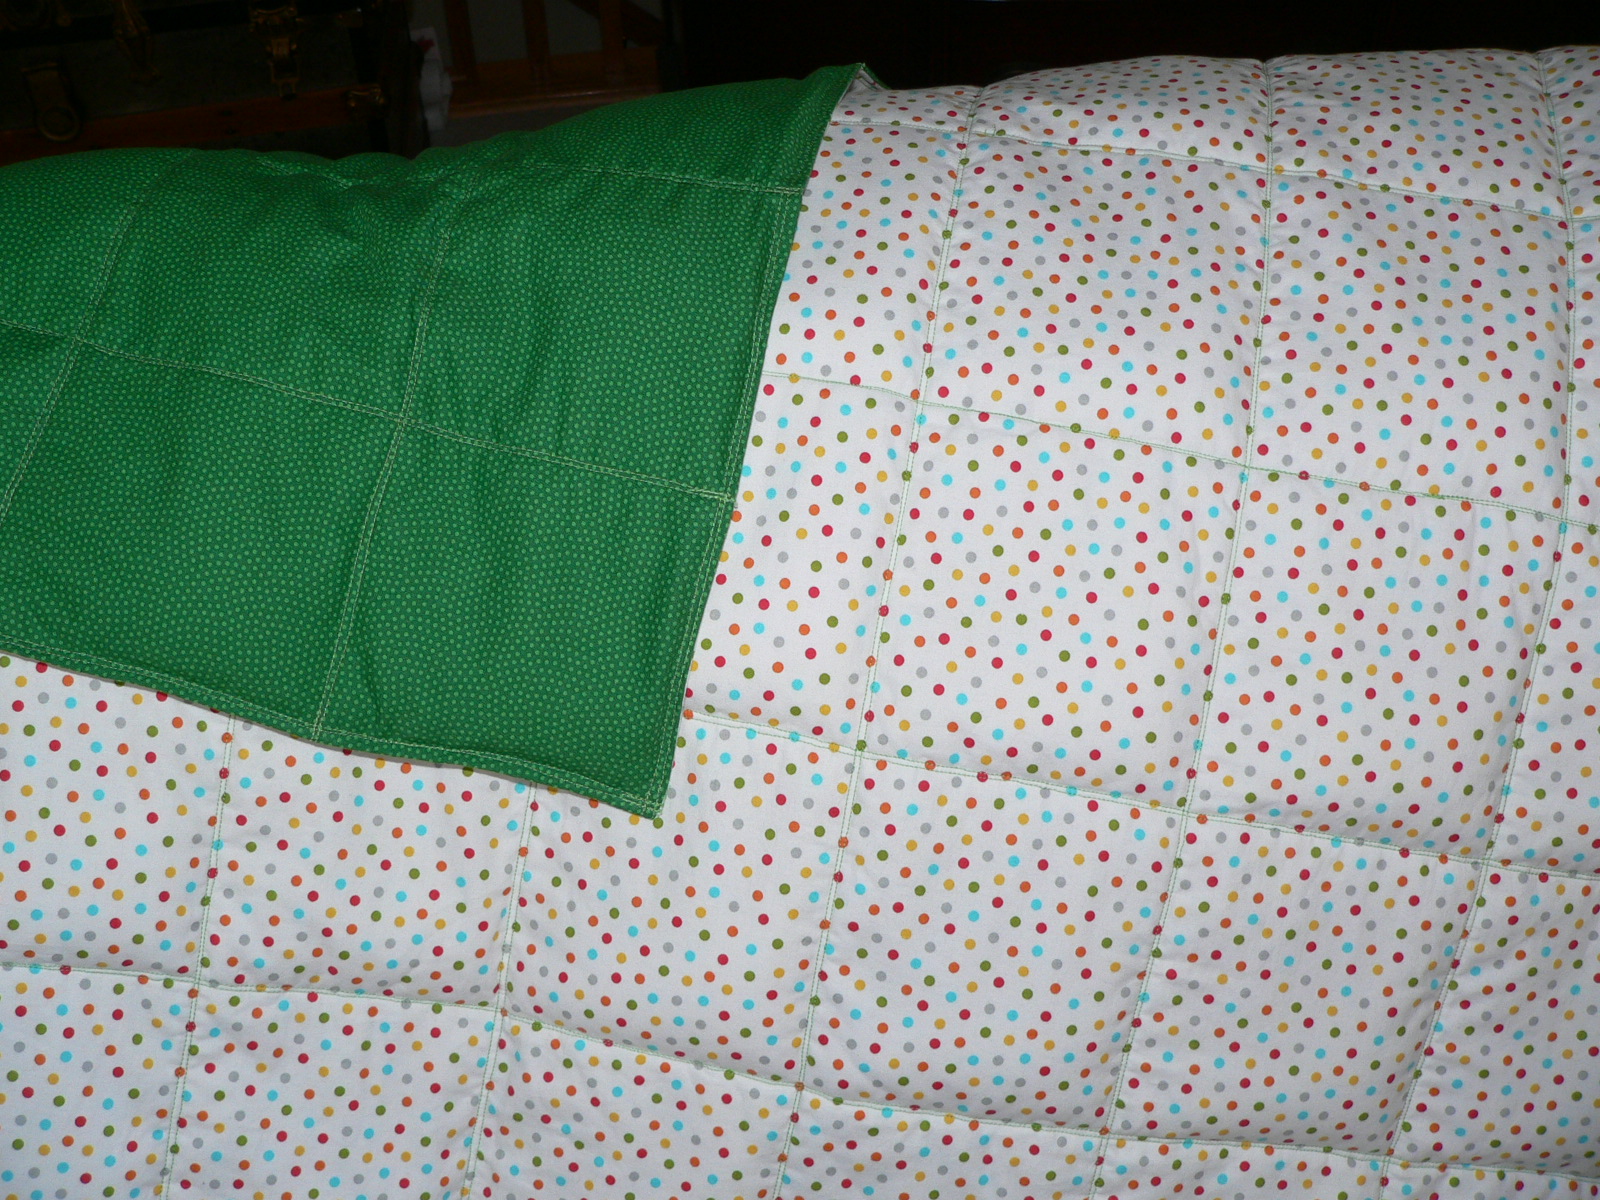
The next step is to mark and sew the columns.  These are the lines going from the bottom to the open top of the blanket.  I used a pencil to make tiny marks evenly spaced across the bottom.  Then I used a hera marker and a quilting ruler to make creases for sewing guides.  I'd rather not use ink, chalk, etc.--the creases show up well on light fabric, are easy to follow, can't damage the fabric, and won't last long.

Anyway, after marking your columns however you like, sew along the lines.  As before, I made two rows of stitching and used a small stitch length for extra security.  I sewed from bottom to top because I didn't want any bunchiness at the bottom.  Next time I'll start stitching at the top so those folded edges stay perfectly even.  Once the pellets are sewn in all the pockets are a little puffy, so I believe any unevenness at the bottom won't be noticed.

The photos above and below show the blanket with the vertical seams sewn and the rows across marked with creases.
Now it's time for filling!  My goal was a 5.5 # blanket and I made the mistake of adding 5.5 # of pellets.  With fabric and batting the final product weighed a bit more than 6.5#!  The blanket is big enough that the whole thing isn't on my grandson at once, but you may want to factor that into your calculations.

I'm fortunate enough to have a digital kitchen scale, so I was able to portion my pellets in grams instead of ounces for greater accuracy.  It was easy to find a conversion tool online--5.5 # equals about 2495 grams.  2495 divided by 64 pockets equals 39 grams of pellets per pocket.
Weigh and pour the first batch of plastic pellets into each column.  Caution!  When I simply poured from the top, tons of pellets stuck to the batting on the way instead of falling to the bottom.  I don't know if it was friction or static, but trying to move them down (I ended up scraping with a yardstick) was a pain!  For the remaining rows I inserted a wrapping paper tube into the blanket and poured the pellets through it all the way to the bottom.  So much better!

Once each column has one batch of pellets (39 grams for mine) it's time to sew along the first crease to form the first set of pockets.  I found that it's helpful to use a row of pins to try to keep the pellets on the far side of the pocket, away from the needle.  Without pins the pellets roam all over, including into the path of the needle--not fun, believe me!
 Once again I sewed two seams.
 As you fill more pockets and the blanket gets heavier, folding it onto your extension table (if you have one) makes it easier to move everything along.
 Last row!
 It was easy to drop in the final pellets.
 Pin the pellets back as usual and clip or pin the top closed.  Sew as close to the top edge as possible (twice, of course) to catch the folded edge in your line of stitching.

Since I had sewn my columns from the bottom up, the folded edges were no longer even along the whole length.  I had to fiddle pocket by pocket to secure the top edge neatly.  Learn from my error!
 Done!
 My grandson likes his blanket, often giggling when he's under it. ☺❤

Monday, January 7, 2019

One Monthly Goal:  Weighted Blanket
January 2019


Elm Street Quilts

I enjoy my newish craft of sewing and quilting but still struggle to make time for it.  I'm hoping that participating in Patty's One Monthly Goal link up will motivate me to keep moving forward.


From the  Mosaic Weighted Blankets website:  "A weighted blanket is like a firm hug that can help you relax and sleep better. Weighted blankets lower stress and create a calm feeling by raising serotonin levels in the brain."

I hope my young grandson will sleep better with a blanket like this.  An occupational therapist friend strongly recommended these blankets in general and this company in particular.  

MWB offers many fabric, size, and weight choices as well as DIY kits, but I decided to go my own way.  Without the benefit of buying in bulk or having a giant stash I'm not saving much money over the kit price, but this should be fun and the fabrics are more customizeable.

I showed my daughter and her husband some novelty fabrics (construction related) but they chose these simpler patterns.  

I'm planning to tweak a tutorial I found online at the "I Love My Kids" blog.  Wish me luck and check out others' goals at January's OMG link up!

Friday, September 26, 2014

My First Quilt

I've always loved textiles:  fabric, yarn, quilts, weaving, colors, textures.  
The melody and harmony of quilt designs especially call to and inspire me.  
Through the years, convinced that I hated sewing, all I could do was gaze and admire.
A few years ago I dipped my toes in the sewing sea, working through some Stitch by Stitch lessons with the girls.  Then last fall Len asked if he could give me a quilting class for my birthday. I think we were both surprised when I said yes!

That class series turned out to be one of my best gifts EVER.  My teacher was wonderful--calm, generous with her time, highly skilled, and encouraging.  Once I picked a pattern she helped me select the fabric.  I knew I wanted to use batiks; the movement and washed quality of the colors are exhilarating.  The problem is that it's hard to narrow my choices down when there are so many gorgeous options!  Sharon has a great eye for color and patiently walked me through the fabric selection process.
Once we had narrowed it down to one light, one medium, and two dark fabrics, it was time to map out the blocks.  The pattern I chose used many small pieces.  The original version called for multiple shades of four different colors.  I kept it simpler with only blues, but that meant I couldn't directly follow the written pattern.  I needed to make my own decisions about fabric placement.

Sharon teased me about over-planning, but I did find out that there were some arrangements I actively disliked.  I needed to draw and see the work on paper--I can't visualize all the options in my head yet.
After the color mapping came the cutting guides.  
Time consuming, yes, but I agree with the carpenter's refrain of "measure twice, cut once."
The class ran for about eight weeks, with homework in between each session.  
This got pretty stressful some weeks, as I was neither a quick nor confident sewer.
As the blocks came together, though, I got more and more excited.  Amazed, really, that I could do this!
My instructor taught me a pinning technique that makes it easier to join corner seams accurately.  If you look at the multiple corners in these blocks, you'll see that most of them match up beautifully.  Thank you, Sharon!

The main body of my quilt was supposed to have 16 blocks--eight in the style you see above, and eight of a different style (see the bottom of my diagram page, above).  After cutting and sewing the first set of blocks, I decided to work like an assembly line, cutting all the remaining fabric, arranging it by block, and then putting it together.

Unfortunately, I ran into a huge problem.  

Quilting seams are supposed to be 1/4".  Exactly.  I thought the edge of my sewing machine's presser foot was 1/4" away from the needle; I measured it, and my seams too.  As it turned out, my seams were just a tiny bit wider than 1/4".

Because of the style of the first blocks, the only problem this caused was that the blocks were smaller than they should have been.  Okay.  The way the second set was built, however, left no tolerance for too-wide seams.  It's a long story, but with seams that weren't exactly 1/4", the little pieces could not fit together properly.  They couldn't match up!  And even if I found a way to make my seams the correct size, the new blocks would be bigger than the first ones, meaning they couldn't be joined properly.  Aargh!

I ended up making all sixteen blocks in style "A".  I was able to salvage some of my already cut fabric, but did need to buy some more.  Thank goodness it was still available!  There was, of course, no way to get back all the time I spent cutting the blocks that were not to be.

As you can imagine, this was my biggest set-back.  Everything worked out in the end, and I am thrilled that I was able to create something as beautiful as my first quilt.  It took a lot of hand-holding and coaching, but that's fine.  More pictures and the rest of the story coming soon!

Tuesday, September 23, 2014

September Science

To culminate their study of cells, Marianna and her classmates created detailed models, many of them edible.  ;-)  Marianna considered making a pizza, but I persuaded her that gingerbread would be simpler and sturdier.
 Surprise!  We had all the fixings already in the house, including some candy left from last Halloween.
 Charming, isn't it?  And so educational!
Can you identify the flagella, Golgi apparatus, mitochondria, or lysosomes?
How about the rough and smooth endoplasmic reticulum?
At least the nucleus and cilia???
Rebecca and I have been reading a biography of Antoni van Leeuwenhoek, a Dutch cloth merchant from the 1600's.  Although he didn't invent them, Leeuwenhoek was fascinated by microscopes.  He studied microbes, blood, insects, and more, recording detailed information and building many of the best microscopes of his day.

We own a stereoscope (3-D) that magnifies up to 40 X, but soon Len will bring home a real microscope (400 X) for a weekend.  Becca and I are preparing for this with a project suggested by our library book.  Each week we're filling four containers:  one with tap water, another with tap water and pepper (as Leeuwenhoek did), and the others with creek water and tap water plus dry grass.  By the time the microscope arrives,we should have fresh as well as one-, two-, and three-week jars to scrutinize.
 We have woods, a tiny meadow, and a creek behind our house, 
so finding some "natural" water was simple enough.
 We were surprised, though, to find a beaver dam!
It did explain why our trek through the grass was so . . . squishy.


I don't have much of a science plan for this year, but we're holding our own for now.

Friday, August 29, 2014

A Tale of Two Wedding Cakes

 I enjoy baking and over the decades have made a few wedding cakes for family and friends.
Two years ago I baked Lauren and Adam's wedding cake.  Since I knew life would get crazy as the big day approached, I assembled, iced, and froze the entire cake a week before the wedding.  Transporting something that tall (and heavy!) was scary but so worth it.

This year I heard God calling me to offer wedding cakes to two brides.  One is Lauren's dear friend, bridesmaid, and college roommate.  The other began her homeschooling journey when our family did, with a preschool co-op organized by her mom.

Both brides accepted my offer and both were married August 2nd!  The shared date certainly complicated my planning.  I prefer to transport a four-tier cake in two parts, assembling and finishing the decorating at the reception venue.  Knowing I wouldn't be able to manage that for both celebrations, I asked MK if a three-tier cake for display and photo ops with extra cake behind the scenes would be okay.  She graciously consented and my planning continued.

Lauren's friend met her husband while they were both studying in Spain.  M is from Mexico, so his heritage and homeland informed the wedding theme.  A found a cake online with ruffly fans that she wanted in coral, white, and aqua.  I breathed deeply and began researching how to recreate the design.  After spending hours looking for similar designs or tutorials, I emailed to ask some far away bakers what decorating tip they used.  It turns out the ruffles are made with a standard petal tip (#104).  Yay!

A and M had asked for a hazelnut cake (like Lauren and Adam's) so I made a sample.  It gave me a chance to practice the fans and try out an assortment of filling options:  chocolate ganache, ganache with raspberry jam, and homemade nutella.  The bride and groom came over to taste and see.  They chose nutella for the filling and A and I critiqued and tweaked the petal variations.
Note the toothpicks on top--marking the filling locations.  
We decided more ruffles were better and that the bottom beading was a no-go.

I volunteered for these weddings months in advance, but there is only so much that can be done ahead.  One long term project was emptying my upright freezer.  I'm a stocker-upper so we had a lot of food to consume.  My family ate some interesting combinations, especially once July rolled around.  Spinach squares anyone?

For a long time it felt too early to bake.  I didn't want cake layers sitting in my freezer forever, so I waited to start.  April--too early.  May--too early.  June--maybe it was time, but it didn't happen.  (I tried to be that mom who takes her kids to the pool.)  July--at last!  But I piddled away the first week of July.  Then we had a week of Vacation Bible School followed by a family vacation in the Adirondacks.  Suddenly the weddings were two weeks away and no baking had begun.  Yikes!

I started with MK's cakes.  She had asked for both chocolate and lemon tiers.  I tweaked a Cake Bible recipe for yellow cake to create the lemon.  It was reliable, with a solid structure (great for assembly) but also a tender, fine crumb.  The chocolate cake turned out to be trickier.

My sisters had recommended a Smitten Kitchen recipe (originally from Gourmet magazine).  It is intensely chocolatey with a super moist, fragile crumb (dangerous to stack).  I seem to be one of the few people in the world, based on hundreds of comments, this cake doesn't rise properly for.  I was skeptical of the recipe's baking temperature of 300 degrees.  After the disaster you see below--a 6" diameter cake that should have been fine--

--I raised the temperature for future batches to 325 with somewhat better results.
I spent a week or more slowly baking MK's ten layers, then a marathon day baking A's eight hazelnut. 
Here they are, wrapped and waiting.
So, yes, there was a lot of cake happening towards the end of July!  I was planning or cooking or shopping almost every day.  The day after buying a 10# bag of sugar I had to go out for more!  My family was wonderfully patient with my preoccupation.  The toughest day for all of us was probably Thursday, when I took a few hours to clean the kitchen and prepare a nice dinner before getting back to cakeness.  I'm not proud of how grumpy I became once those hours were gone and a long night stretched before me.  Always room for improvement . . .

Eventually it was time to starting putting the tiers together.  I tried to work with cold cake (a sturdier state), especially the fragile chocolate.  Extra batter had been baked and was used to patch the hollows.
A thin layer of ganache was spread between the cake layers before adding the icing--a flavor boosting idea I borrowed from my sister.
Do you use a crumb coat?  It's a thin layer of icing that, when chilled, keeps the crumbs contained so the rest of the icing can later be applied easily and neatly.  The delicate and dark chocolate cakes needed their crumb coats more than anything I've ever baked!
Below are MK's cakes.  The biggest round tier is lemon, as is one of the double layer rectangles.  The other rounds and rectangle are chocolate.  One of the things I enjoy most about this picture is seeing how well we emptied that big freezer.  As I said, it took months, but there was plenty of room for cake!

I could have assembled, iced, decorated, and frozen MK's cakes a few weeks before her wedding, but as it turned out they weren't all done until the night before.  They were fresher than Lauren and Adam's!
Friday night I also finished icing the four tiers of A's cake.  Her wedding was late enough that I decided to decorate it on Saturday.
When I began trying to figure out how to make petal arches that were a consistent size and would meet without overlapping, I called my local cake supply store to see if there was a tool available to make it happen.  The generous woman on the other end of the phone knew exactly what I needed--her advice.

She told me to get some adding machine tape, wrap a strip around each tier, and cut it to fit.  Then fold the tape in half and half and maybe half or thirds until it looked right.  Draw or trace a curve that looked nice, cut it out, wrap the tape back around the cake, and trace the curve with a toothpick.  Guidelines done!

Len and I worked together for a while and then I "allowed" him to finish that technical, vital task.  I think I was coloring icing or something . . .

The next day, MK's brothers came to pick up her cakes.  It was quite a sight--one not large car, three tall young men, and a cake on a seat, a lap, and a floor.  I'm told they all made it safe and sound.

Meanwhile it was time to start piping petals.  It had been about six weeks since my sample attempt, so I wanted to practice a bit (ya think?) before committing coral to the actual cake.

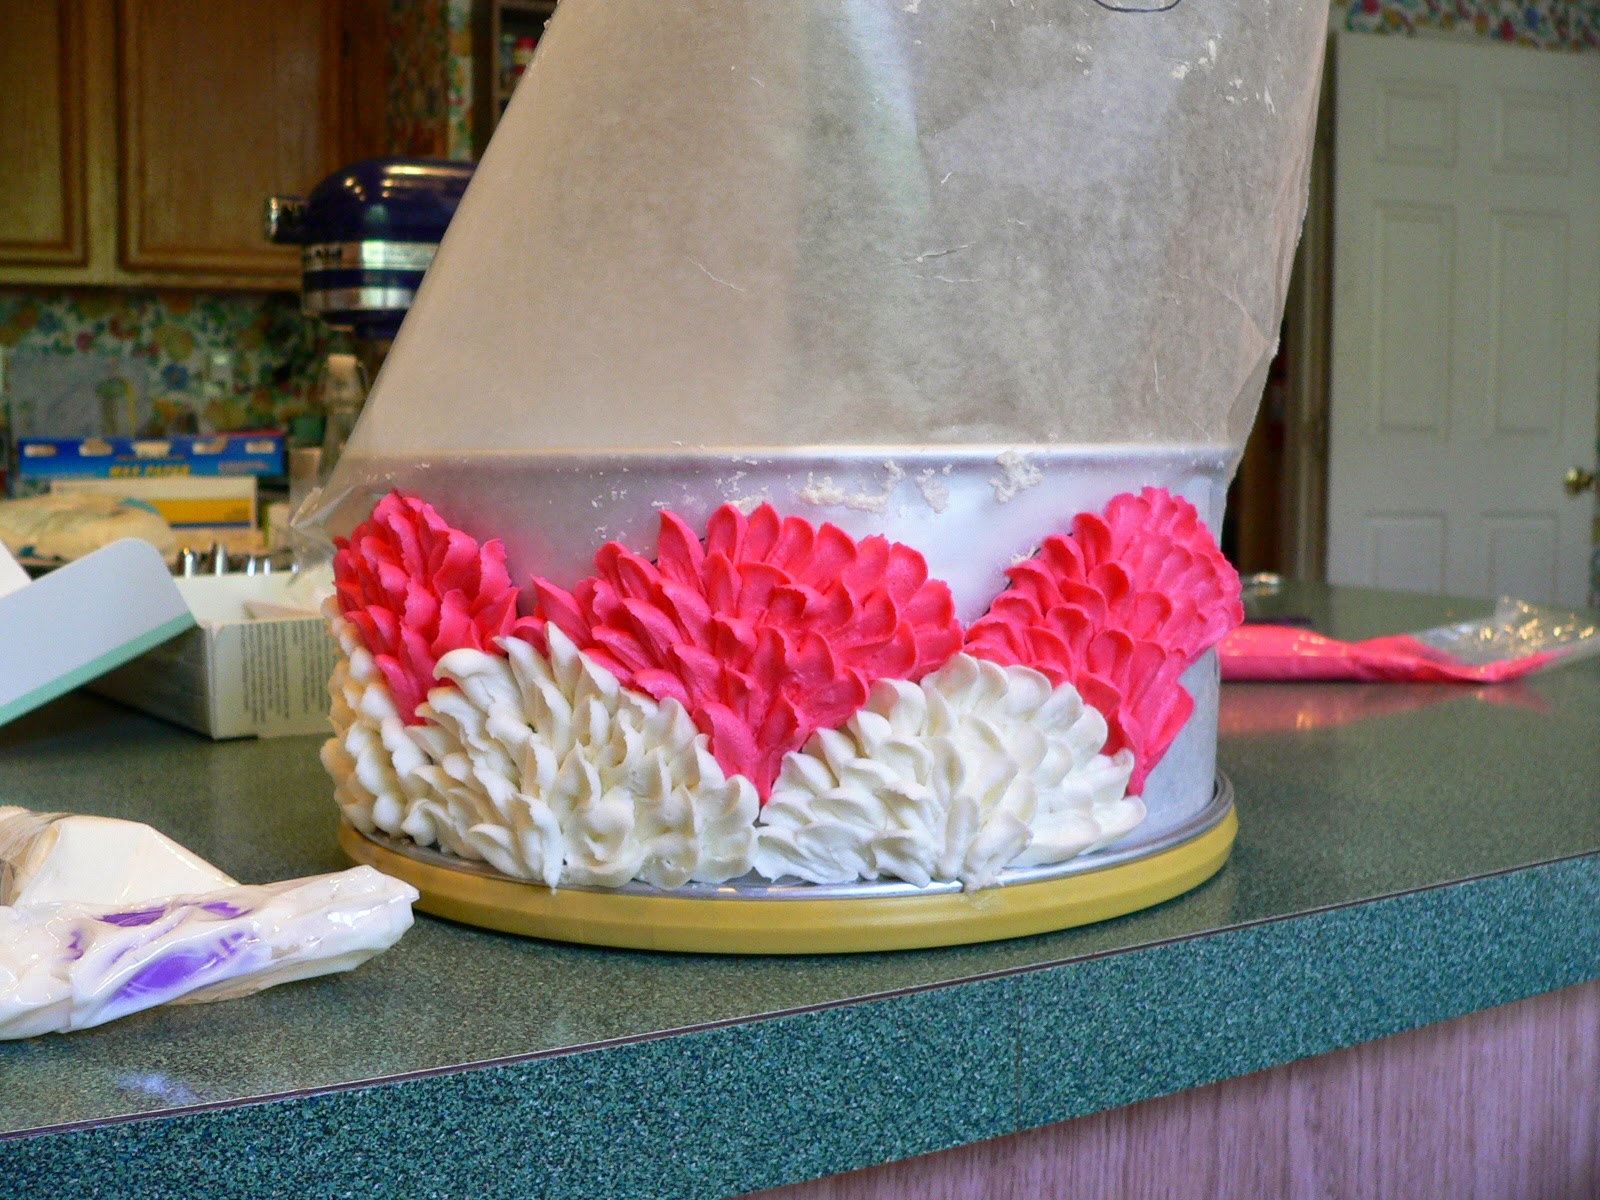
First I traced the design onto waxed paper
then attached it
to a faux cake.
and got to work with some extra icing.
Time for the real deal . . .
My photography skills are not the greatest; this kitchen shot gives the best approximation of the coral icing.
It looks too dark and too orange in all the other photos.
Cake in the back of the van on our way to the wedding.
I put a "wedding cake on board" sign in the window to explain our careful turns to other drivers.
  The bottom tiers (12" and 16" diameter) were so heavy!  
I think Adam made some sort of remark about Olympic lifting . . . 
When he wasn't commenting on how many pounds consisted of butter (he's a healthy guy) . . .
I thought I was fairly calm that day, but once the top two tiers were in place, a knot in my stomach uncurled.  Even though there was still work to finish, there was no more chance of a transportation disaster.  Alleluia!  I finally relaxed.

I brought a few bags of goodies with me to the wedding venue:

  • spatulas for setting the cake in place
  • a bag of white icing
  • extra icing and a spatula
  • toothpicks and a scraper
  • a pitcher of ice water to keep my decorating hand cool
  • scissors for the flowers
  • my good shoes (I started out in sneakers.)
  • paper towels
  • wipes
  • etc.

That last layer of white petals had to be piped on site.  If those fans had been put on in advance they would have been smushed when we put the cake together at the wedding.  (Needing time for final assembly and decoration of a huge cake is why MK's needed to be a more manageable three tiers.)
When you look at individual petals and fans it's obvious that there is a lot of variation. You could also call it inconsistency.  This is the type of thing that usually really bugs me, but the joy of this design is that the overall look and ruffly feel is so much more important than the up close details.  It's exuberant!
When the florist told me that the bride had chosen roses for her cake, I was surprised.  I assumed they'd be too formal for the lively fans, but no.  She chose "free spirit" roses, and they were GORGEOUS!  Big, blousy, warmly coral.  The picture below does not do them justice.
Len, Lauren, and Adam also helped with transportation, assembly, and flower arranging.  Thanks, guys!  Seriously--no one enjoys helping move or put together such an important package.  The consequences of a mistake are too nerve-wracking.

This was an exciting summer project.  I spent plenty of time and energy (much of it mental!), but it was gratifying to offer something special to two beautiful brides (and their grooms).  I also enjoyed the chance to stretch my baking and decorating skills.  Apparently I'm not too old to learn something new.  ;-)